
I had intended to write this post before I left for the Kungsleden, but as usual real life got in the way of my cyber life and I ran out of time. I still wanted to write it though, so once I arrived home I cleaned and sorted my gear and then collected it all together to take photographs before putting it away.
One of the advantages of writing my packing post after rather than before the event is that I have the benefit of hindsight and can comment on what I got right or wrong and how I would change things if I was to do this again.
As I walked the first two sections of the Kungsleden in 2014 I already had a pretty good idea of what I’d need and so overall I think I got my packing right.
 I use a Deuter backpack. It’s the ladies version and I have it adjusted for the smallest size torso, but still think it could do with being slightly shorter. I have this problem with every backpack I’ve tried though. The weight I was carrying didn’t help because it pulled the pack down. Once I didn’t have to carry so much, this wasn’t a problem anymore.
I bought the pack in 2014 for my first leg of the Kungsleden and felt it served me well, so I had no hesitation in using it again this time. It’s a little weighty (just over 3kg), but this is because it’s tough and has plenty of pockets. The pockets helped me arrange my gear so I could find things easily and unpack/repack quickly. It’s a top loader as well as having a zipped front and I love this combination – no more weighing the advantages of one style against the other. As for the toughness, well I’ve had other packs that have started to fall apart when I’ve carried much weight in them or knocked them about too much. I really didn’t want this happening mid-Kungsleden.
The pack holds 65 + 15kg so was great for fitting everything in.
As you can see on the photo, I keep my supply of spare laces tied to the front. This means they can also be used to tie things on to the outside of the pack if need be.
Here’s what I had in my backpack:
Camping gear

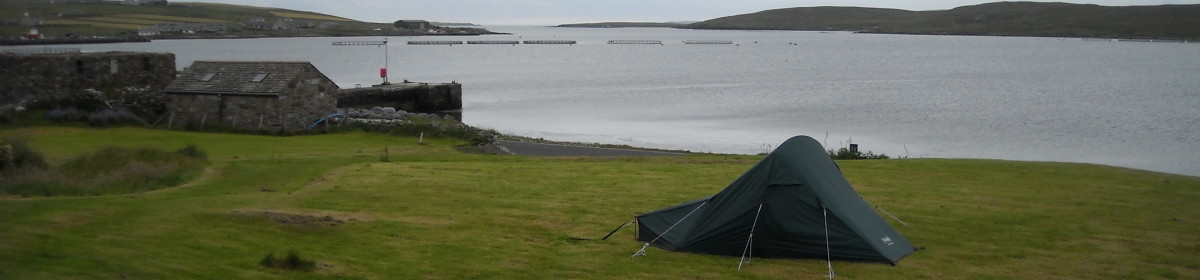
Tent – my tent is in the green bag on the right. It’s a tiny one-man Vango and only weighs 1.2kg. It’s also storm-proof and has been well tested on my both my Kungsleden trips, and in Shetland. Vango tents are great. This is my second one (I also have a two-man) and I love them both. I wrote more about my tent here.
My tent is kept fastened to the front of my backpack so I can quickly get to it when it suddenly throws down with rain. No having to open my backpack and root around inside to find it.
Sleeping bag – I’ve had my Vango sleeping bag a long time. It has a comfort rating of -5°C and an extreme rating of -18°C. These are the ratings designed for men and as women usually feel the cold more than men it’s standard practice to take 5°C off when working out the ratings for women. This means my sleeping bag has a personal comfort rating of 0°C which is about right. Once the temperature drops below 0°C I do start to feel the cold and have to pile more clothes on. This only happened a few times on my Kungsleden trek, so I was happy with this sleeping bag.
It’s big and takes up the whole bottom part of my backpack and weighs in at 1.8kg, which is way more than my tent! I do have a slighter lighter down sleeping bag which is just as warm, but as I knew it would get damp from the sides of the tent (the disadvantage of a tiny tent) and down isn’t good when it’s wet, I didn’t want to risk it.
Thermarest – until I was given this as a present I’d always used foam sleeping mats. I still think foam sleeping mats are good, but now I’ve tried a Thermarest it’s my first choice. It gives slightly more comfort than a foam mat, but is just as warm. The main advantage is that it folds down much smaller than any foam mat will do and fits inside my pack. Although I’ve never compared weights, I assume the Thermarest is slightly heavier than a foam mat, but for me the advantages more than make up for this.
Sheet – this isn’t a usual thing to carry on a hike, but in Swedish hostels and cabins you need to provide your own bedding or pay a hefty rental charge. I carry a cotton sheet which I spread over the mattress and pillow (I don’t want to carry a separate pillow case) and then use my sleeping bag instead of the provided duvet or blankets. As I knew I’d be spending a few nights in hostels at the end of my trip I needed the sheet.
Most people carry a silk sleeping bag liner which only weighs a few grammes and folds up really small. I don’t like sheet sleeping bags as they don’t open along the sides and so feel too restrictive. Also, although I know they’re acceptable in huts along the trail, I’m not sure if they’re allowed in hostels in the towns. I intend to get myself a silk sheet for future trips to Scandinavia as I’m sure this would be lighter, and take up less space, than cotton.
Rubble Sacks – I had 2 rubble sacks with me (they’re the blue plastic bags you can see in the photo). They are tough, hard-wearing and keep my sleeping bag and sheet dry. The one I keep my sleeping bag in doubles as a doormat just inside the door of my tent.
Cooking gear

Stove – my stove is a Primus gas stove with an ignition switch (so nice not to have to mess with a lighter or matches). There are some really tiny stoves out there which just sit on top of the gas canister, but I like the stability of this one. The gas canisters are easy to find and can be bought in huts along the Kungsleden. I don’t have one pictured because I had to leave it behind when I flew home. Expect to pay around 80SEK (£7.20) for a regular sized canister in huts and fell stations.
Aluminium foil wind guards – I have one that sits underneath the stove and one that wraps around it. They don’t just protect the stove from wind, but also reflect the heat back to the stove and pan. This makes the boiling time quicker and thus saves gas. I only ever carried one gas canister (apart from when one was just about empty and needed replacing) and so needed to be careful to use as little as possible when I was walking the two sections of the path without huts. Of course, if I had run out of gas I could always have lit a fire and cooked on that, but a stove is so much easier.
Aluminium pan and lid – I bought these in the early 1990s in Australia and they’re still going strong. They’re quite light and I can stuff them with food when I pack them away so I don’t have any wasted space in my backpack. The lid doubles as a frying pan, but I don’t think I’ve ever used it as one. It is essential though for keeping the heat in as I boil water – I really notice the difference if I don’t use it. Aluminium cools down quickly which is important when you want to pack away straight after cooking.
Pan handle, lighter, can opener and spork – I use a pan handle that grips the edge of the pan or lid. I’ve tried a few different types in the past, but this is the best.
I carried 2 lighters just in case anything went wrong with the ignition on my stove (it didn’t). They’re also useful for lighting campfires or candles in huts.
It’s possible to buy tiny thumb-sized can openers, but I forgot and so brought this one. Although it’s bigger than need be, it doesn’t weigh very much or take up much room. I used the can opener once, but didn’t need the bottle opener or corkscrew parts.
I had 2 sporks (combo knife, fork, spoon) with me and they both snapped. Probably because I was using cheap supermarket ones and not the real thing. I couldn’t find my real spork before I left and so picked these up when I spotted them. The first one broke within the first few days (it got squashed) and the second broke towards the end of the trip whilst I was using it to stir instant mashed potato. Moral of the story: always use a real spork.
Knife – this is from Swedish company Light My Fire and has a fire steel slotted into the handle. It’s a good multi-purpose sharp knife in a protective case. I didn’t use the fire steel because, well, I’m not very good at using them and as my stove has an ignition I didn’t need it anyway. I really should practise using it as they are a good thing and other people make using them look so easy.
Washing up sponge and soap – although I carried a real washing up sponge, I didn’t carry washing up liquid. Instead I used a small bar of soap I’d got from a hotel. I kept them together in a plastic bag. The soap got the dishes clean, but needs to be well-rinsed. Although it’s not ideal, I think I would use this again.
Plastic mug, plate and bowl – these are part of a picnic set and weigh virtually nothing. The mug is a good size for cuppa soups and Mug Shots as well as drinks. The bowl was used for muesli – when I cooked pasta or mashed potato I tended to eat straight from the pan. The plate doubled as a chopping board.
Thermos flask – I nearly always carry a flask and I was glad of it on this trip. I don’t always want to dig in my backpack and get all my cooking gear out just because I fancy a cup of coffee, so having a flask with hot water that I’d boiled when I did have my cooking gear out was always really welcome.
Also, as my tent is tiny and doesn’t have much of a porch it’s not possible to cook inside. So when it was raining or very windy and I didn’t want to stand outside cooking it was great having a flask of hot water I could use to make soup, noodles, mashed potato or even a hot drink.
Occasionally, I also used my flask to make soup for lunch. I’d add some dehydrated veggies and half a stock cube to the boiling water in the morning and by lunch time everything would have rehydrated and I’d have a flask of tasty soup to have with my Knäckebröd and squeezy cheese.
The other use for my flask was as an extra water carrier if I was going to be walking or camping on a stretch where the streams have dried up. This wasn’t a problem this time, but last time there were a couple of occasions when I was glad to be able to carry extra water.
Walking Gear

Boots – my boots are leather with a Gore-Tex liner and are in good condition. I reproofed them before leaving. I still got wet feet. I don’t think that was because of these particular boots as just about everyone I spoke to had the same problem. I guess when you spend several weeks plodding through a swamp, walking through heavy rain and wading through streams, the only chance you’ve got of keeping your feet dry is to wear wellies. My feet were damp rather than sodden and they were only even damp on the worst days, so I guess that my boots were pretty good in the bigger scheme of things.
Socks – 2 pairs of walking socks, one pair of which I would be wearing. I only buy walking socks without seams to avoid rubbing.
Walking poles – I couldn’t walk without them. They take the weight off my knees, help with balance and are great for testing how deep the bog is before I step in it and sink up to my waist.
Duct tape – I have duct tape wrapped round both poles. Duct tape is great for fixing backpacks (when I walked the Great Glen Way my backpack ended up being held together with duct tape), fixing tents (I used it to patch a hole in my tent last time I walked the Kungsleden after a ninja squirrel chewed its way in and stole my biscuits) and can also be used as an addition to your first aid kit in an emergency (fortunately I’ve never needed it for this).
Maps and Guidebook

Maps – there are 3 types of maps covering the Kungsleden. I use the ones above because they’re waterproof. I could keep the map in the side pouch of my backpack where it was easily accessible and I didn’t have to worry about it disintegrating in the rain. The scale is 1:100,000 which takes a bit of getting used to when you’re more familiar with OS maps and a scale of 1:25,000. When the path is straightforward and especially if you’re up high and can see far it’s not a problem. The problem is when you’re walking in forest so can’t see anything and the path winds and zig-zags all over the place. What looks like 1/2 km on the map can actually be a lot further and it can get a bit disconcerting to be walking past swamps, rivers and bridges that, due to the scale, just aren’t shown on the map.
I wasn’t able to buy the maps in the UK and had to wait until I got to Sweden. Fell stations at the end/start of each section sell them and they cost 140SEK (£12.60) each. If you walk the whole trail you’ll need 4 maps.
Compass – the path is generally easy to see and is usually well-marked. I think I only used my compass once and even then it wasn’t strictly necessary. However, I’d always want to have one with me in case of snow (yes, it’s possible) or fog or heavy cloud cover. Of course, there’s no point having a compass if you don’t know how to use it – learn before you go!
Guidebook – the only one in English is by Claes Grundsten. The English translation is really inferior as it’s heavy, the pages fall out and the maps are so dark it’s impossible to tell what they represent. I always use paperclips to mark pages in guidebooks – with this one the paperclips were also holding it together. Some of the information is useful, but he does use too many pages going into unnecessary details. From talking to others on the trail my view tallies with the general consensus.
With hindsight (which I really should have had having walked the Kungsleden before), I should have only taken the relevant pages with me and left the rest at home. I don’t like tearing pages out of books, but as this book falls apart anyway, that’s not an issue. Or I could have done like one girl I met who’d photocopied the book and burnt the pages as she finished each section.
If you speak German you’re in luck because there’s an updated version of the German translation available. The pages don’t fall out, the maps are good and it has useful details, like the times the saunas in the huts are open, which the English edition lacks.
Keeping Warm and Dry

Waterproof jacket – I used a lightweight one that doesn’t breathe that well and so wasn’t great. I have a much better one at home, but it’s a winter one and would’ve been way too warm and heavy for this trip. If I was to do this trip again I’d invest in a lightweight but decent waterproof jacket.
Waterproof trousers – I have great waterproof trousers. They keep me dry and they breathe so I don’t get sweaty. It’s important to have waterproof trousers that you can easily pull on over your boots as the last thing you want to do when it chucks it down is to have to sit down in a swamp and take your boots off. My trousers have zips running to the top of each leg which makes putting them on really easy. Even though they’re great I don’t like having to wear them as I feel my movement is a bit restricted in them. Because they’re so easy to put on I never feel like I have to wear them ‘just in case’.
Hat and gloves – both of which I wore on several occasions. My hat is from Iceland and is really warm. My gloves aren’t the warmest, but were warm enough and don’t restrict my hands too much.

Fleeces – the thin pink fleece got worn a lot. I didn’t need the big green windproof fleece as often, but was really glad I had it when it did get cold. It doubled as my pillow at night except for the few really cold nights when I ended up wearing it.

Gaiters and water shoes – these are the only things I had with me that I didn’t use. I really should have worn my gaiters on the last two days as I had water splashing up into my boots (I was wearing my waterproof trousers, but these don’t help when you splosh through a deep puddle). Each time I realised I needed them it was already too late and there was no way I was opening my pack up to get them out as everything would have got soaked.
I brought water shoes in case I had to wade through a river that was so deep I’d need to take my boots and socks off. I really wouldn’t want to risk cutting the soles of my feet when I needed to spend hours each day walking and carrying a heavy load. Each time I needed to wade through a stream or river on this trip I was able to find a shallow bit or find enough rocks to pick my way across without getting my feet wet. There was one occasion on my first trip when I had to wade in water that came over my knees, but as the water was clear and I could see the river bed was smooth, I didn’t need to wear them. Even though I’ve now made two trips and completed the whole path and never needed to wear them, I would bring them again just in case.
Clothes

Two pairs of 3/4 length very thin trousers – they dry quickly when wet, are light to carry and don’t take up a lot of space in my backpack and are cool enough to be comfortable on a hot day.
Two pairs of leggings – can be worn on their own, but I usually wore them as a warm layer under my trousers on cold days. I’ve also worn them at night as an extra layer.
Two t-shirts – worn on their own on a hot day or with a fleece on a colder day. I also carried a thin long-sleeved top, but it isn’t pictured as I threw it away before coming home.
One pair of pyjama bottoms – thin, full-length. I wore them at night in my sleeping bag. As I don’t use a sleeping sheet I think at least if my body is covered it will help keep my sleeping bag clean. Also, if necessary I could’ve worn them during the day as an extra layer (luckily I didn’t need to).
One pyjama top – very thin with long sleeves. Again this was something I could wear in bed to help keep my sleeping bag clean. It could also have been used as an extra layer in the day if necessary.
Dry bag – I kept my clothes in the red Exped dry bag shown above. I could really squash them down in the bag and get all the air out so they didn’t take up much room in my backpack. The dry bag kept them dry even when the bag ended up sitting in a pool of water.

Underwear – 5 pairs of knickers and 2 sports bras. Although I could wear the same t-shirt for a week, I really didn’t want to wear the same knickers for a week (fussy of me I know). It’s easy enough to rinse them out each day in the rivers and lakes, but can then take several days for them to dry. 5 pairs worked well.
Socks – I took one pair of ankle socks to wear in the tent when I wanted to give my feet a break from my walking socks (or my walking socks were damp) and it was too cold to not wear any socks. These are also the socks I wore to sleep in on the few really cold nights.
Dry bag – a smaller sized dry bag than the one I used for my clothes, but it served the same purpose.
Toiletries

2 bars of hotel soap, 2 small bottles of hotel shampoo, 1 deodorant, scrunchy for washing with, comb, razor, tweezers, nail clippers, cotton buds (wrapped in a small plastic bag), cotton wool pads (also wrapped in a small plastic bag), toner (for cleaning my face), facial moisturiser with SPF 15, lip balm, small pot of vaseline, toothbrush with cover, 2 small tubes of toothpaste (samples from my dentist), dental floss.
I kept my toiletries in the side pocket of my backpack rather than in a special toiletries bag.
Towel – this is the one thing I still can’t make my mind up about. I used a regular bath towel. Although it’s quite a thin one it still added weight and took quite a bit of space up. I’ve tried special backpacking towels before, which are light and fold up quite small, but I’ve never liked using them. I don’t like the way they seem to spread the water around rather than absorbing it when I try to dry myself. They also seem to smell worse and more quickly than a regular towel. If I was only going to be away for a week I might have been able to put up with this, but I didn’t want to put up with it for 6 weeks. On the other hand, it’s because I was carrying it for 6 weeks rather than one week, that I wonder if I should have gone with a travel towel.
If you can recommend any travel towels that feel and smell good, please leave me a note in the comments below.
Water

I carried 2 x 500ml plastic water bottles. I kept them in the side pouches of my backpack so I could easily reach them. When there was plenty of easily accessible water around I’d only use one of them.
I also had a 3 litre Platypus water bladder. I never needed to use this to carry extra water, but did use it at my campsites. I’d fill it once I’d set up camp and so didn’t have to keep going back to the river or lake to get water. I most appreciated having this when it was raining and I didn’t want to keep getting out of my tent for water.
First Aid

Small first aid kit – this contained a variety of plasters, antiseptic wipes, a small tube of antiseptic cream, a couple of sachets of burn gel, tick tweezers and a small pair of scissors.
Compeed blister plasters – these are like having an extra layer of skin and can help stop blisters forming. They’re expensive and feel very weird compared to regular plasters, but they are good. I was fortunate to not get any blisters this time, but last time I walked the Kungsleden I was very glad of them.
Whistle – for emergency use only. Six blasts a minute and then a minute’s pause signals that help is needed. Three blasts a minute is the response to let the person in need know they’ve been heard.
Medicines – I only carry paracetamol and ibuprofen.
Technology

Camera – my camera case is shown above, but not the camera because I was using it to take the photo. The case is bigger than it needs to be for the camera, but this means I have space to squash the orange dry bag in the bottom. I usually have my camera hanging round my neck to it’s easy to get to when I want to take a photograph. Having the dry bag inside the case means I can quickly cover the camera when it starts to rain.
Camera batteries and charger – the charger is quite bulky and in two parts. I carry 4 camera batteries, each of which lasts quite a long time. I took a lot of photos and only used 2 batteries on this trip, so I think in future I could leave the charger at home.
Kindle (in a protective case) – so much lighter than carrying lots of books. The charge doesn’t last as long as I’d like, but I never actually ran out. I had access to electricity at Jäkkvik, Ammarnäs, Adolfsström and Hemavan and made sure it was fully charged at each place. I carried a USB charger for my Kindle.
Phone (in a protective case) – as there’s no signal or Wifi in most places I kept it switched off most of the time. I had a USB charger and made sure it was charged at each place there was electricity. The places with electricity were also the places I could get Wifi.
USB plug and adapter plug – my USB plug only charges one device at a time and I needed to use it with an adapter for the European plug sockets. I’ve just ordered a European plug with 4 USB points from Amazon and this is what I’ll use next time. As long as I don’t need to charge my camera batteries and don’t have my laptop with me then I shouldn’t need to carry an adapter plug anymore.
Miscellaneous

Journals – I found these very appropriate looking notebooks in Sainsbury’s and took two of them with me. I wrote so much I almost filled them both.
Pens – I took 5 pens and it wasn’t enough. Two broke in my backpack and three ran out of ink. I had to buy a couple more in Ammarnäs and also bought a pencil just to be on the safe side.

Sunscreen – a big tube of factor 30. Last time I used lots of sunscreen. I didn’t need so much this time, but still used quite a bit.
Insect repellent – it helps, but I still got lots of bites.
Midge net – this is a hat with a midge net attached. It’s important it’s for midges as well as mosquitoes as midges are a lot smaller and can get through the holes in a mosquito net. The hat springs open when you take it out of the case. I struggled to fold it back together and so it hasn’t fitted back into the case as snugly as it should. I really needed this on a couple of occasions, so although it’s not the best thing to walk in as it does affect your vision a bit, I was SO glad I had it.
Sunglasses – prescription lenses and in a protective case.
Buff – head protection for sunny days. I never needed to use it.
 Small pouch/bag that can be worn across my body and has various pockets. I used this to keep my documents handy at the airport and to keep money in. I was able to separate currencies into the different pockets. It also holds my phone, tissues, pen, lip balm, etc. When I was walking I kept it in the bottom of my backpack.
Money belt – I never actually wore this as I felt quite safe in Sweden. I kept it in my backpack and used it to keep my passport and receipts in.
Head torch and spare batteries – I only needed this when I was reading very late at night in my tent.
Toilet roll – very important! Keep it in a plastic bag to ensure it stays dry.
Hand sanitizer gel – for those times when it’s not possible to wash your hands.
Sandals – these are Birkenstocks and so have a shaped insole. I need to wear arch supports inside my footwear and as they would slip out of most sandals I need them to have built-in arch supports. These have cork soles so are quite light and as they only have one strap they lie quite flat. I wear them when I need a change from my hiking boots. I wore them to walk round Stockholm all day and I wore them occasionally in my campsites. I wouldn’t wear sandals to hike in as I need the support boots give me, so it didn’t matter that these aren’t hiking sandals.
Small sewing kit – from a hotel. I needed it last time, but didn’t need it this time.
Fold-up shopping bags – these are from Ikea and I took two of them. They are really light and take virtually no space up, yet they hold an awful lot. I used them for my hand baggage on the plane, train and bus and instead of a daypack or handbag when I had a day walking round Umeå and a day in Stockholm. Whilst I was on the Kungsleden they came in useful when my Knäckebröd (Swedish crispbreads) wouldn’t fit inside my backpack and needed tying to the outside.
So that’s everything I had with me for my 6 weeks in Sweden and my 34 days walking the Kungsleden. This is what it looks like when I put everything together.

I don’t what the overall weight was that I carried, but when my pack was weighed at the airport on the way out it was 19.5kg. I had quite a lot of food with me, but then added more food, a gas canister and the contents of my hand luggage (e.g. phone, Kindle, chargers). I also had water. Of course the weight fluctuated as I ate food and then replaced it, but overall I will have been carrying over 20kg which is too heavy for me. It slowed me down, which wasn’t a problem as my intention was to spend the summer in the wilderness, not to see how fast I complete the trail. If I’d needed to move more quickly it would have been a problem.
I don’t know what I could have done to make it much lighter without making compromises I wouldn’t want to make e.g. not having a good sleeping bag or risking running out of food.
Have you got any tips on how I can get my pack lighter? Add them to the comments below.

Hey! I will go to Kungsleden in few days and I am so happy for this article 🙂 Since I am a travel blogger and share my stories live with my followers, I wanted to ask in how many mountain cabins or places there is wifi or signal or electrificity? 🙂 We go from Abisko to Nikkaluokta 🙂
Thanks a lot!
Hi Andy, I’m glad you found the post useful. But I have bad news for you … prepare for a digital detox! Once you leave Abisko you can say goodbye to electricity and wifi and even a basic phone signal. You really are in the wilderness on the Kungsleden. Put your phone in the bottom of your backpack and forget about it until you get to Nikkaluokta.
Enjoy your trip! Let me know how it goes.
Anne
Anne recently posted…Getting Organised – January 2018 Review